
Introduction
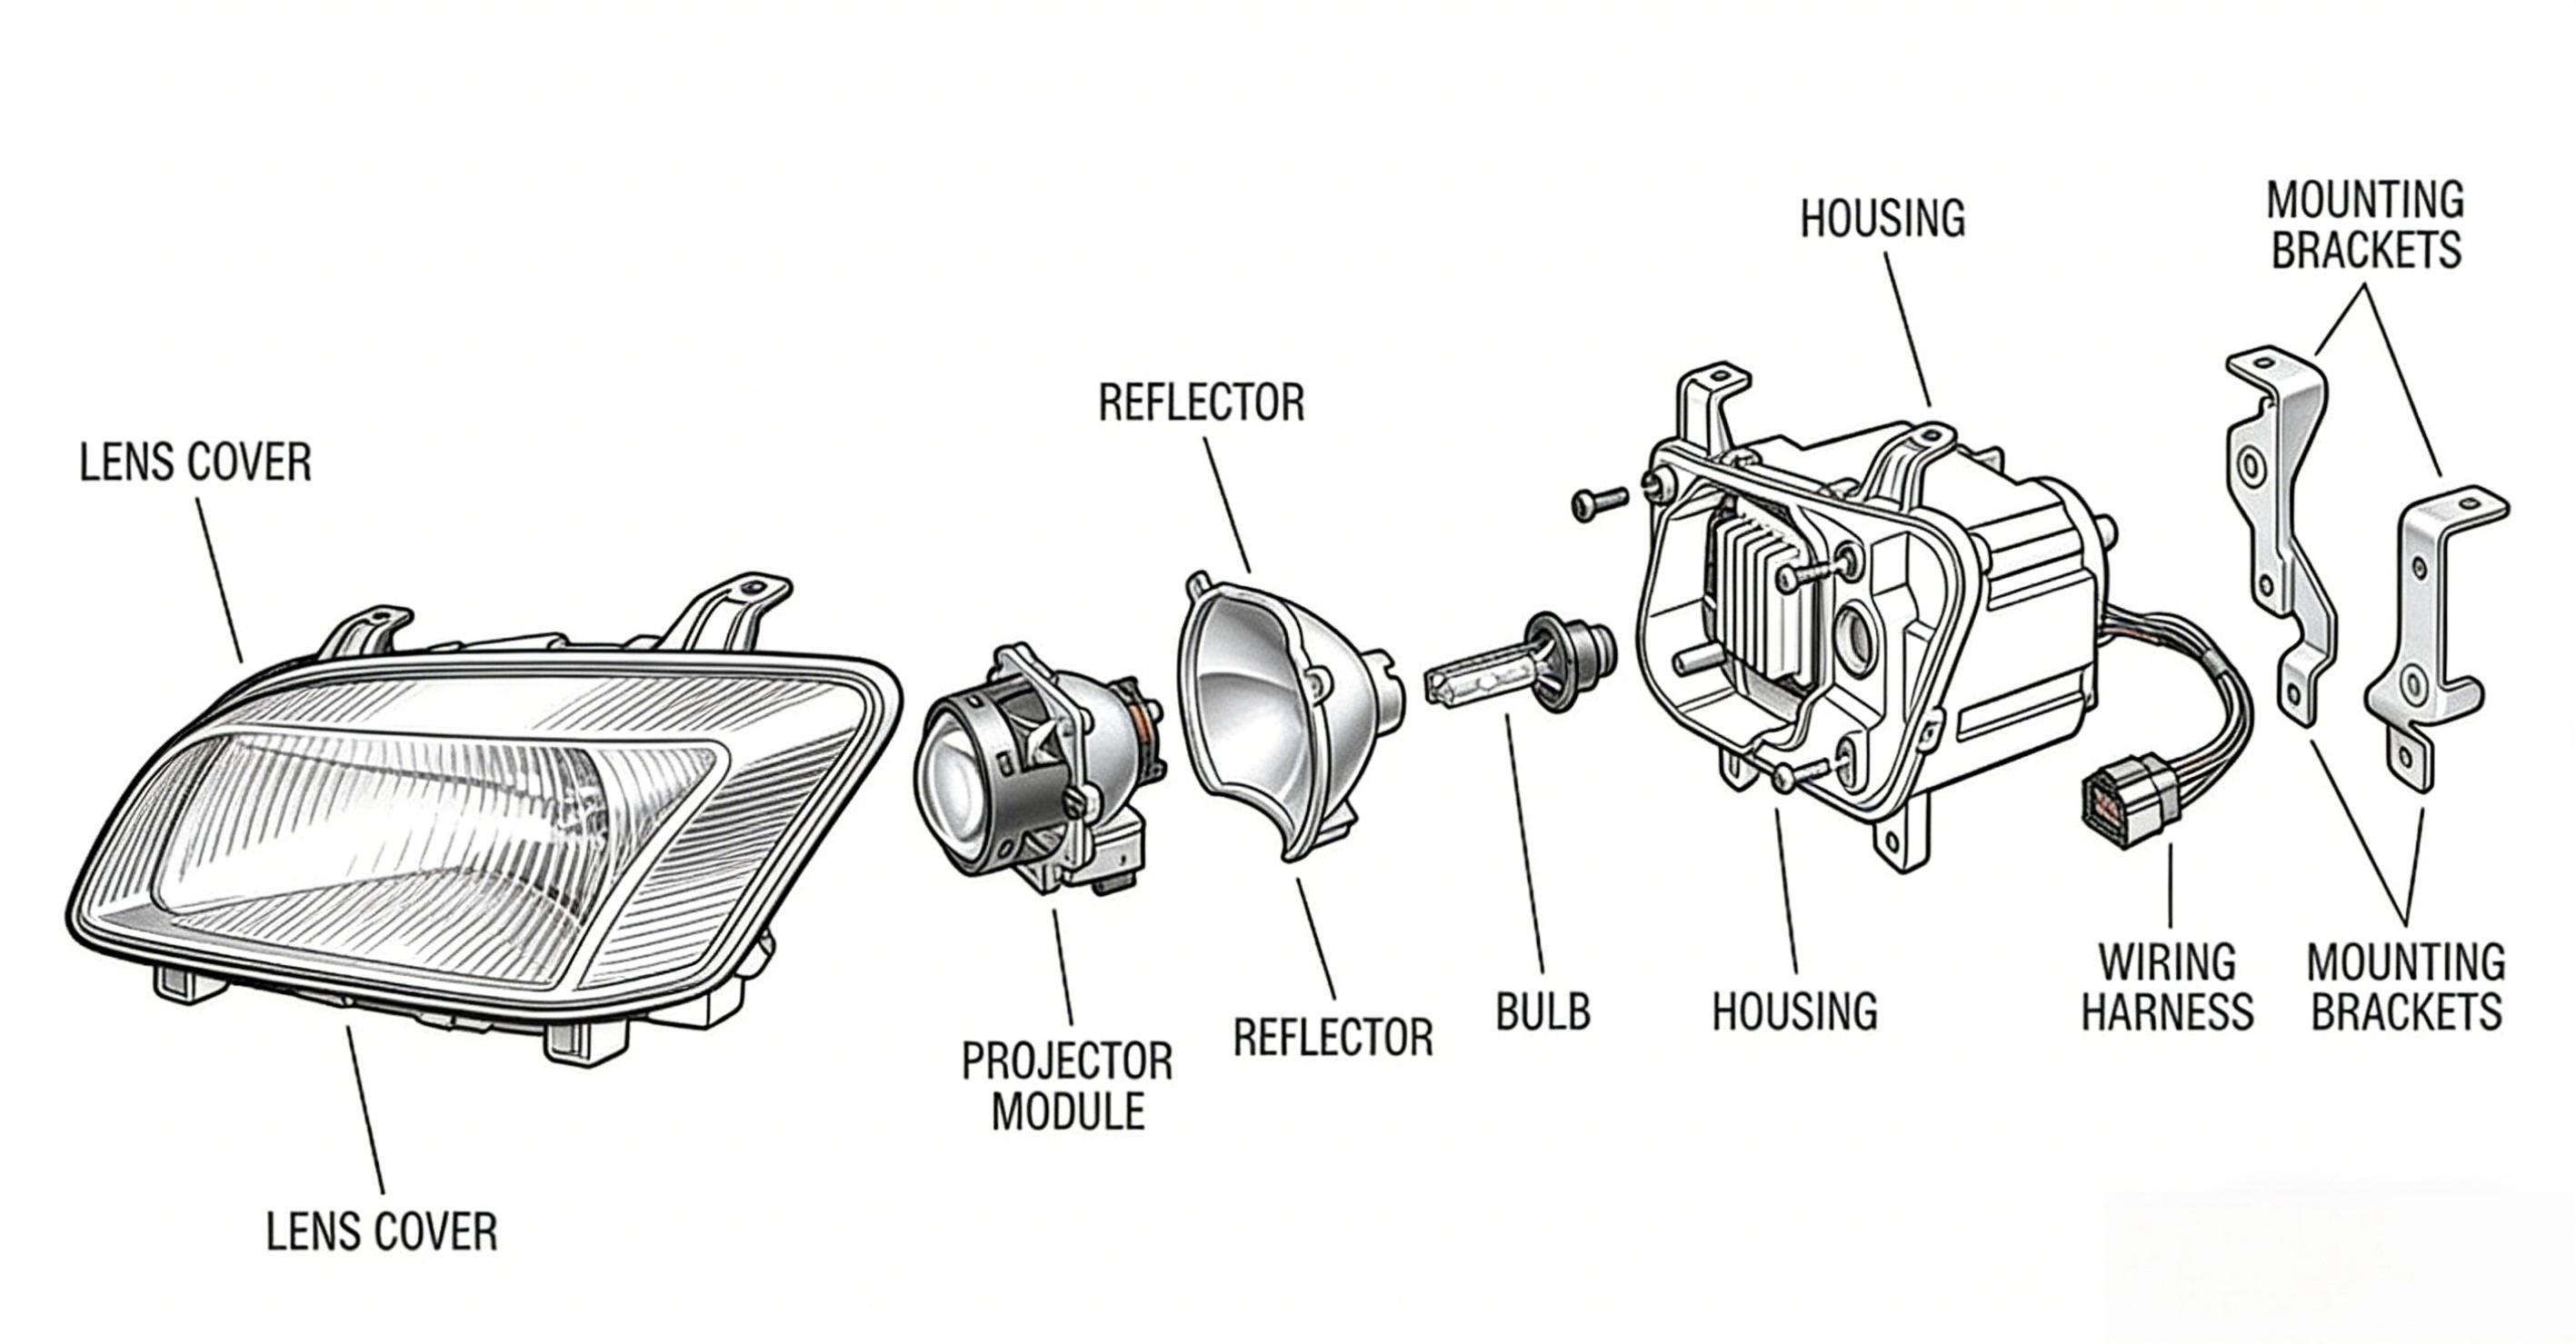
Headlight parts play a much bigger role than many vehicle owners expect. A headlight assembly is not just a housing for a bulb. It is a complete system made up of optics, structural components, electrical parts, and in many newer vehicles, modules that interact with leveling systems or driver assistance features.
In some situations, replacing a single bulb is enough. In others, replacing the complete headlight assembly is the better solution for restoring correct beam performance, fitment, and long term reliability.
Headlight parts also influence whether a vehicle passes inspection, whether glare is properly controlled. For vehicles equipped with auto leveling systems, adaptive lighting, or other integrated features, choosing the correct assembly is not only a fitment issue but also a safety and system compatibility issue.
The importance of the headlight system goes beyond appearance. The headlights of a car are integral to driving safety, especially at night or in poor weather conditions. When a driver chooses the right parts and installs them correctly, the result is better road visibility, stronger lighting performance, and a safer vehicle overall.
Common Headlight Assemblies and Technologies
There are several common types of assemblies used across passenger vehicles, and understanding the differences helps buyers make better repair decisions.
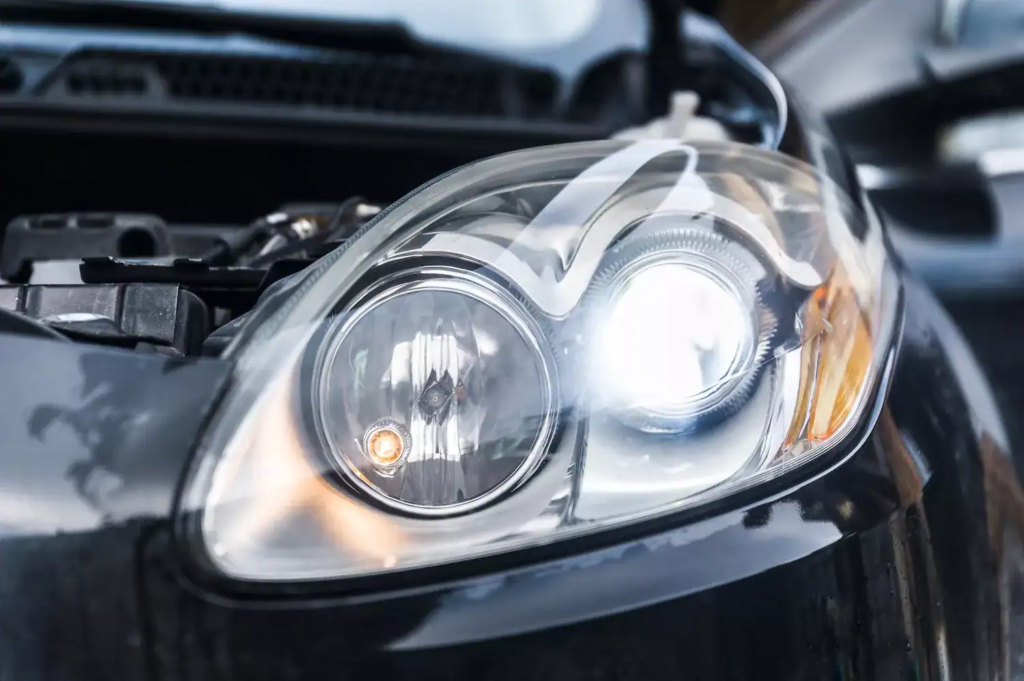
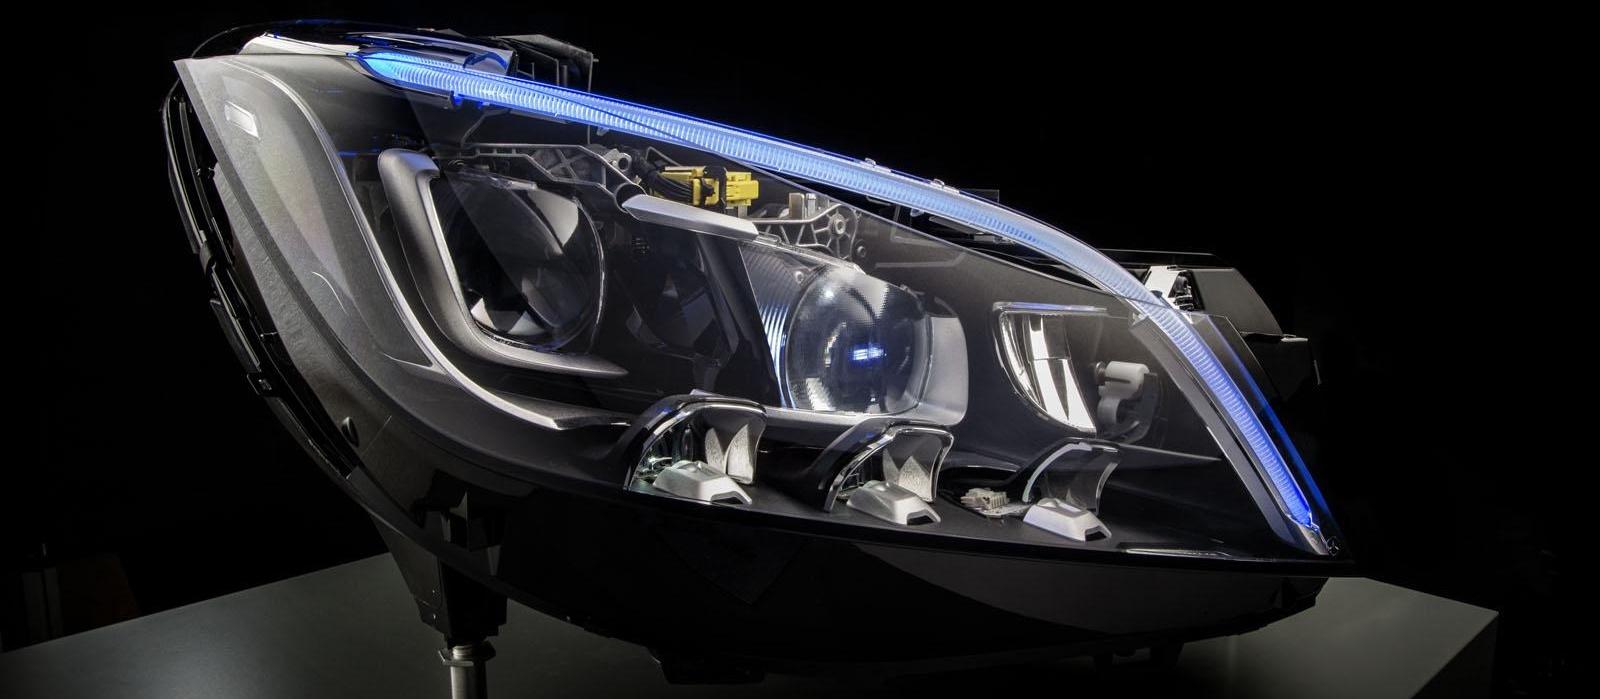
Reflector vs projector assemblies
Reflector headlight assemblies use a reflective bowl to direct light forward. They are widely used and are often more cost effective, but their beam performance depends heavily on the exact position of the bulb and the internal reflector geometry.
Projector assemblies use a lens based optical system to focus and shape the beam. In general, projector designs provide tighter beam control, a more defined cutoff, and reduced glare for oncoming traffic when they are properly designed and correctly aimed. Because of that, projector based assemblies are often preferred in applications where beam precision is especially important.
Bulb technologies: halogen, HID, and LED
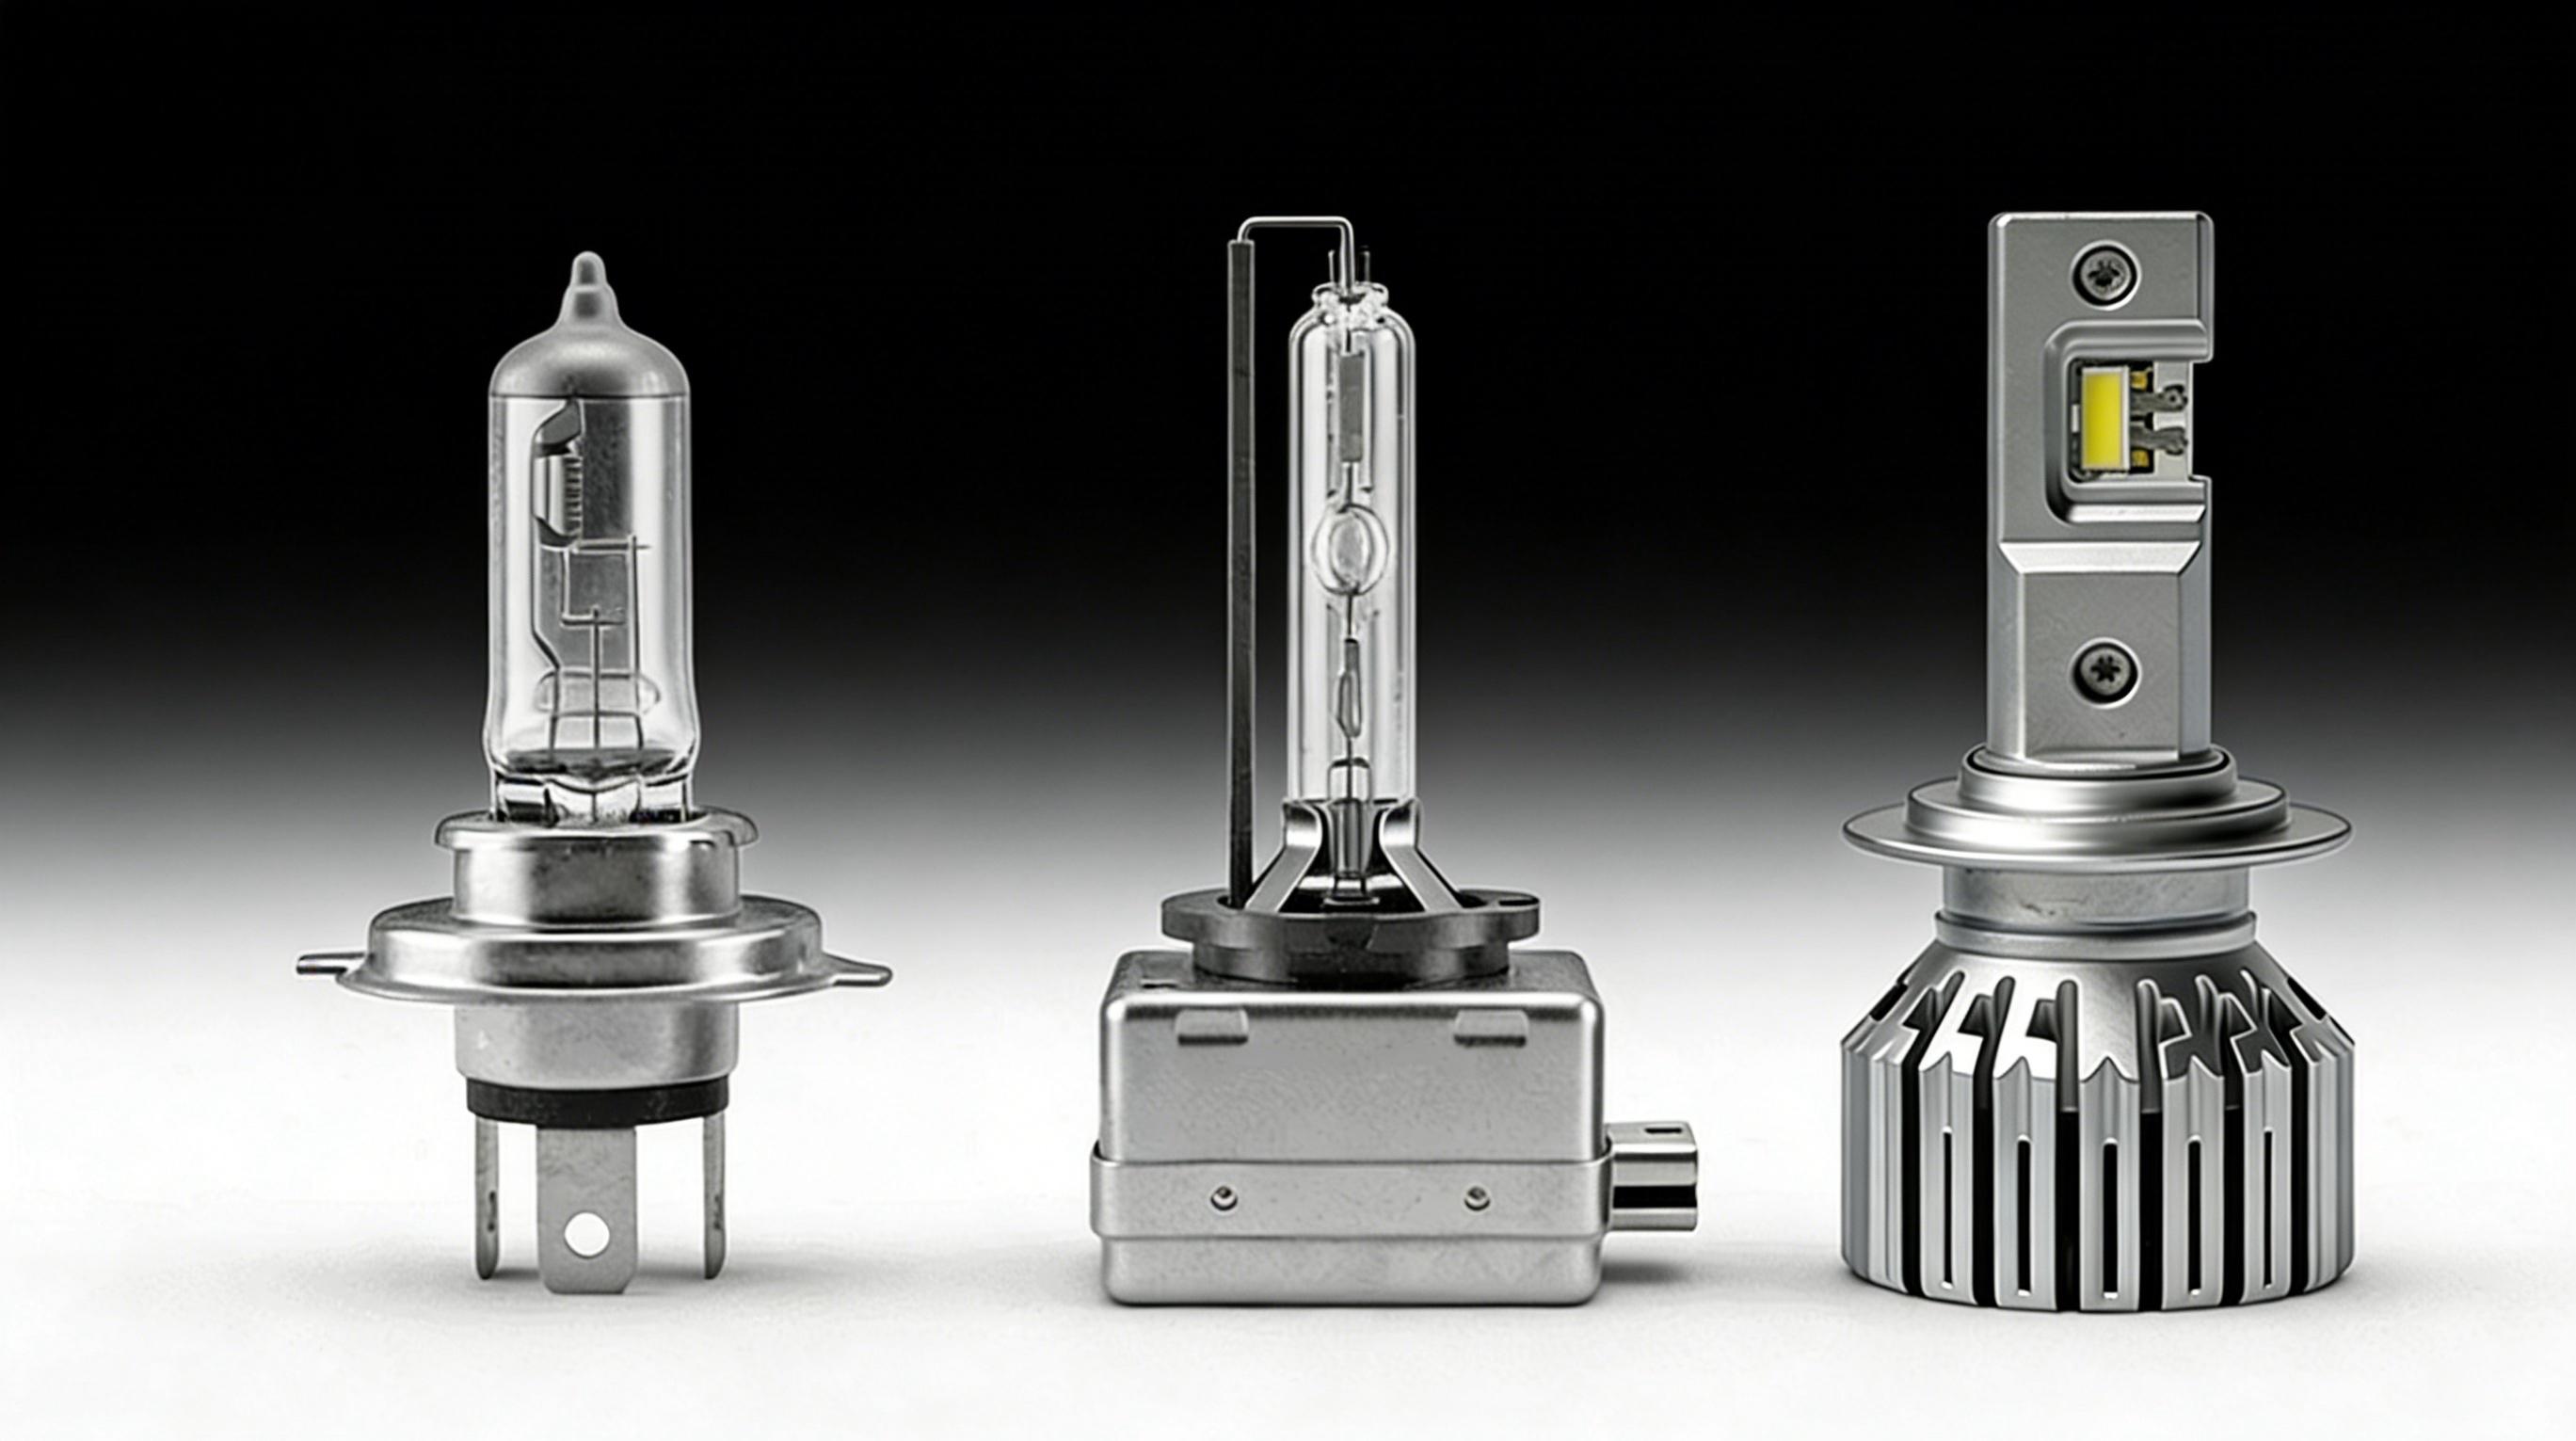
Headlight assemblies
may use different light source technologies depending on the vehicle design.
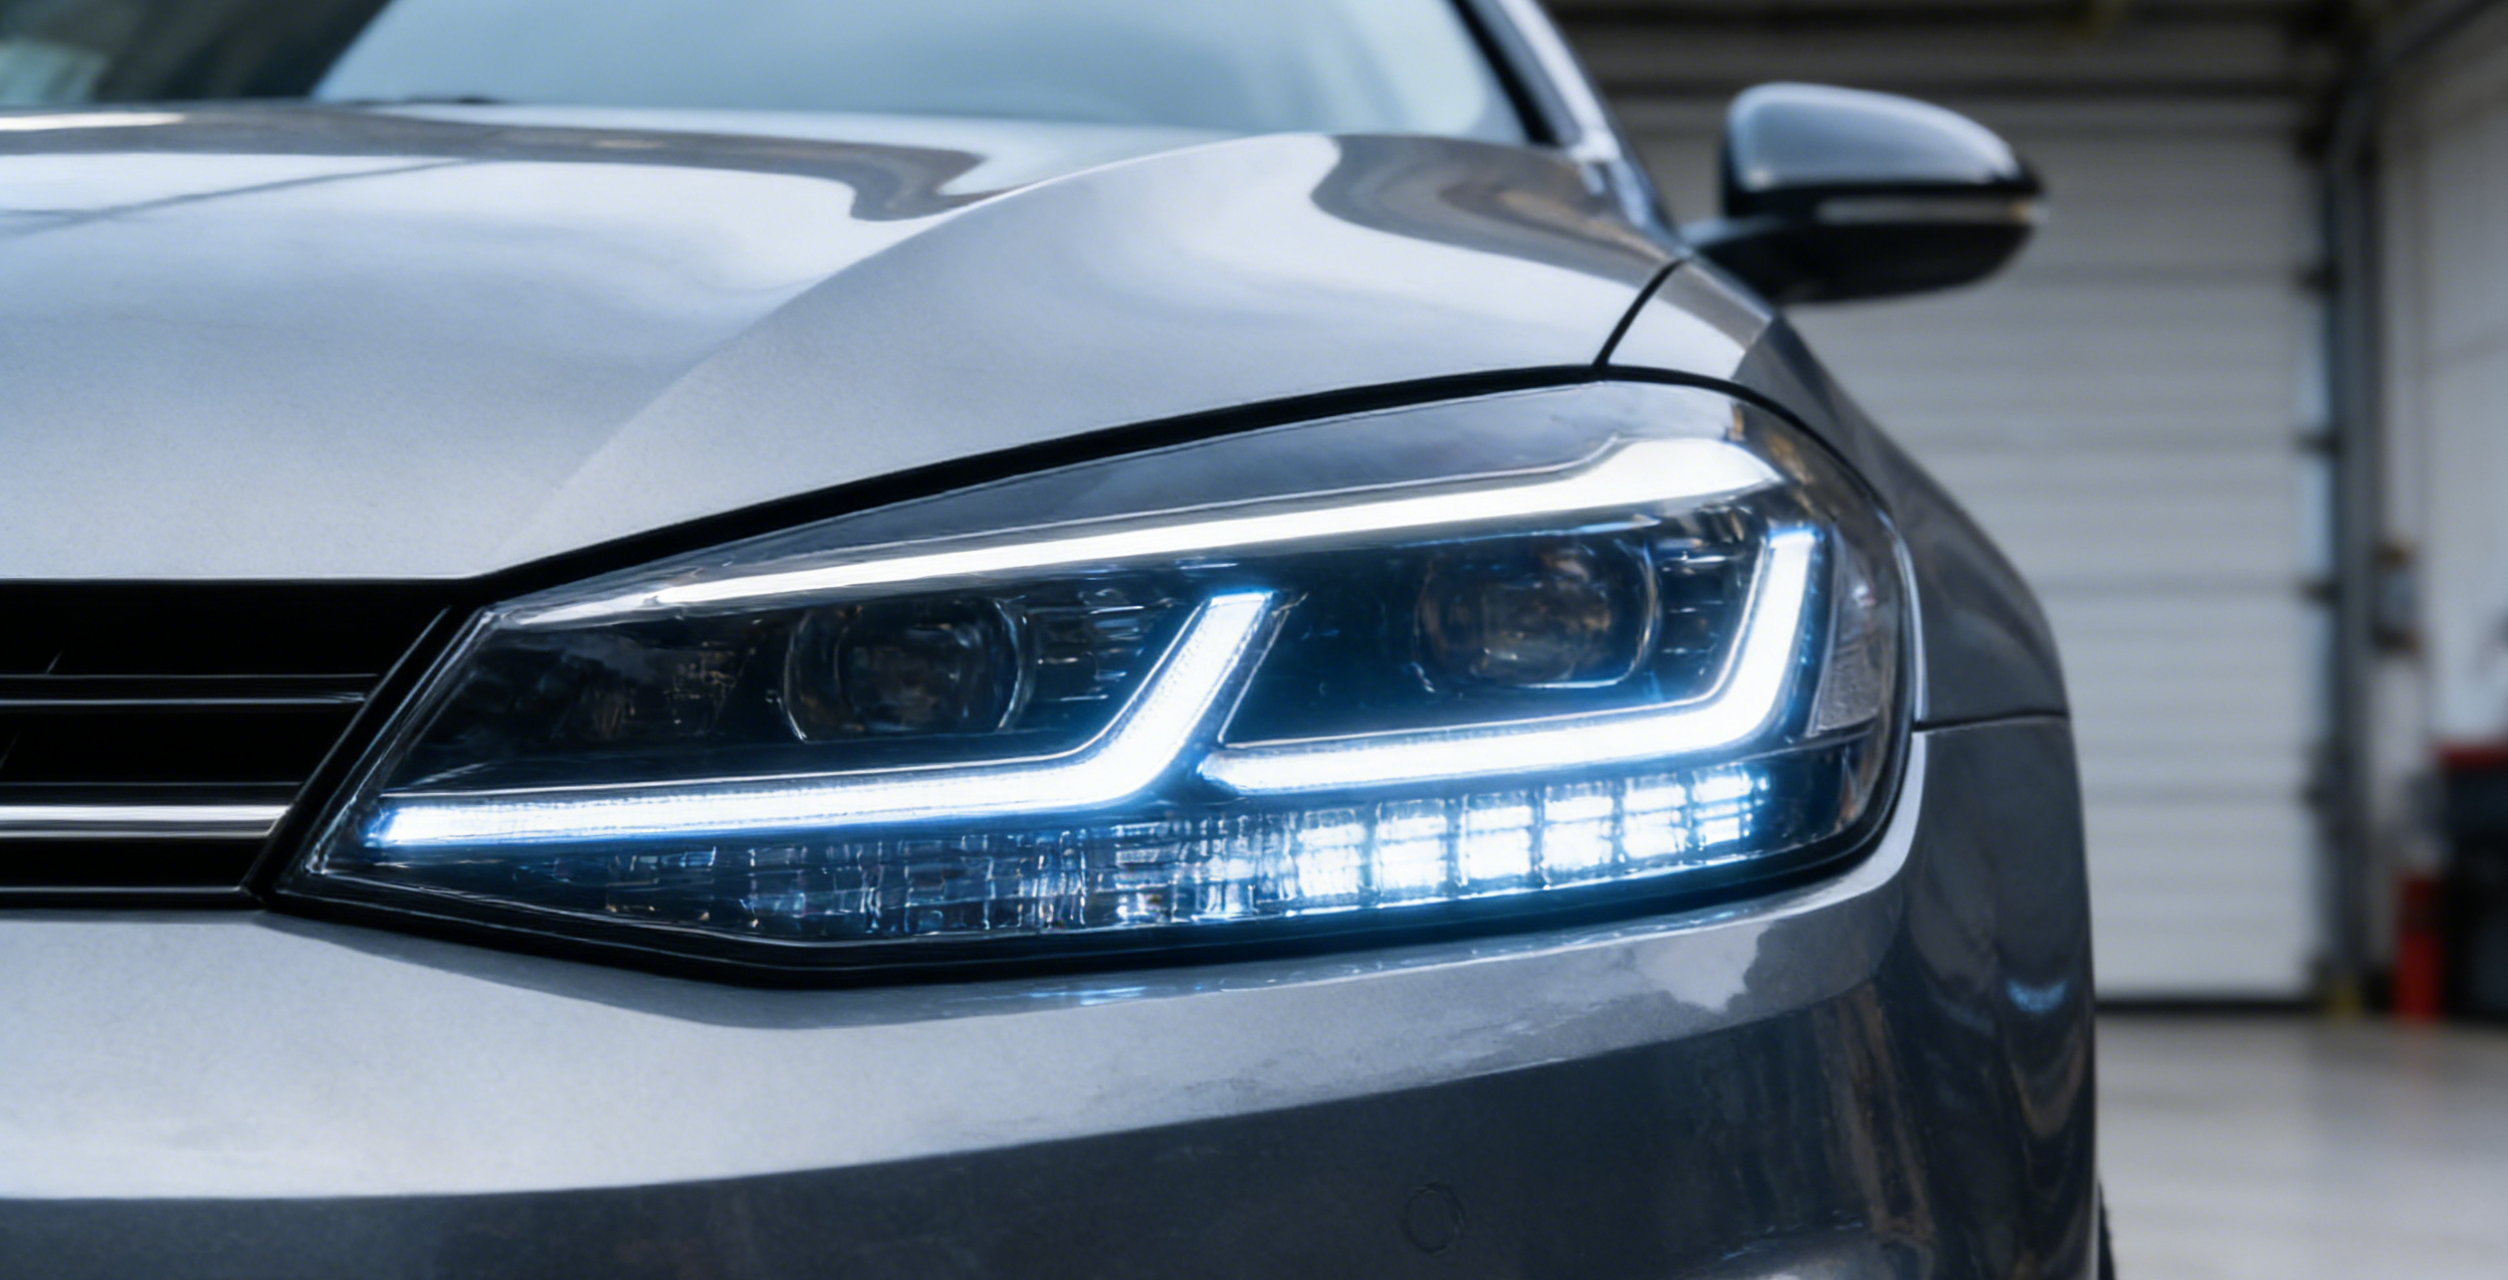
Halogen bulbs are the most common and budget friendly option, but they have the shortest lifespan compared with HID and LED. HID systems use a ballast and discharge bulb to produce higher intensity light, but they involve more components and more complex electrical operation. LED systems have become increasingly common because they offer longer lifespan, faster response, and higher lumen output per watt than halogen systems.
Many modern cars now come standard with LED headlight technology, which improves brightness and energy efficiency. However, LED assemblies also tend to be more integrated and less serviceable at the component level.
OEM vs aftermarket assemblies
OEM headlight assemblies are manufactured by the original carmaker and are guaranteed to fit the vehicle properly. OEM headlight assemblies are designed to match the original vehicle specifications in fit, optics, mounting geometry, and electronic compatibility.
OEM parts are also designed to work with the vehicle’s safety systems, ensuring optimal performance and longevity. OEM parts are built to manufacturer standards, but they are typically more expensive than aftermarket options. Choosing OEM headlight assemblies can also help maintain the vehicle’s resale value due to their quality and reliability.
Aftermarket assemblies can reduce purchase cost, but quality varies widely by manufacturer and model. Aftermarket headlight assemblies may not meet the same safety and performance standards as OEM parts. Some aftermarket products perform well, while others may show differences in beam pattern, material quality, sealing, or connector compatibility. That makes supplier quality and fitment data especially important when buying outside the original equipment channel. If you are comparing aftermarket headlight assemblies, focus on trusted suppliers, verified fitment data, and consistent optical performance before making a purchase, contact us.
Integrated modules and auto leveling systems
Many modern headlight assemblies now include integrated modules, internal drivers, leveling motors, or adaptive beam control components. These features improve functionality, but they also increase replacement complexity. After installation, some vehicles may require professional calibration, scanning, or system initialization to ensure that the new assembly works correctly with the vehicle’s electronics.
Types of Headlight Assembly Configurations

Headlight assemblies are not built in the same way across all vehicles. The service approach often depends on the type of configuration used.
Sealed beam or composite assemblies
Sealed beam units contain the optical system and light source in one integrated unit. When the light source fails or the housing becomes damaged, the entire unit usually must be replaced.
Composite assemblies are more common on modern vehicles and may still allow bulb replacement, but they are designed as a larger housing with multiple integrated functions.
Modular assemblies
Modular designs separate certain components such as bulbs, drivers, or internal lighting modules. This allows more targeted repairs in some cases without replacing the full headlight assembly. However, whether repair is practical depends on the vehicle design and part availability.
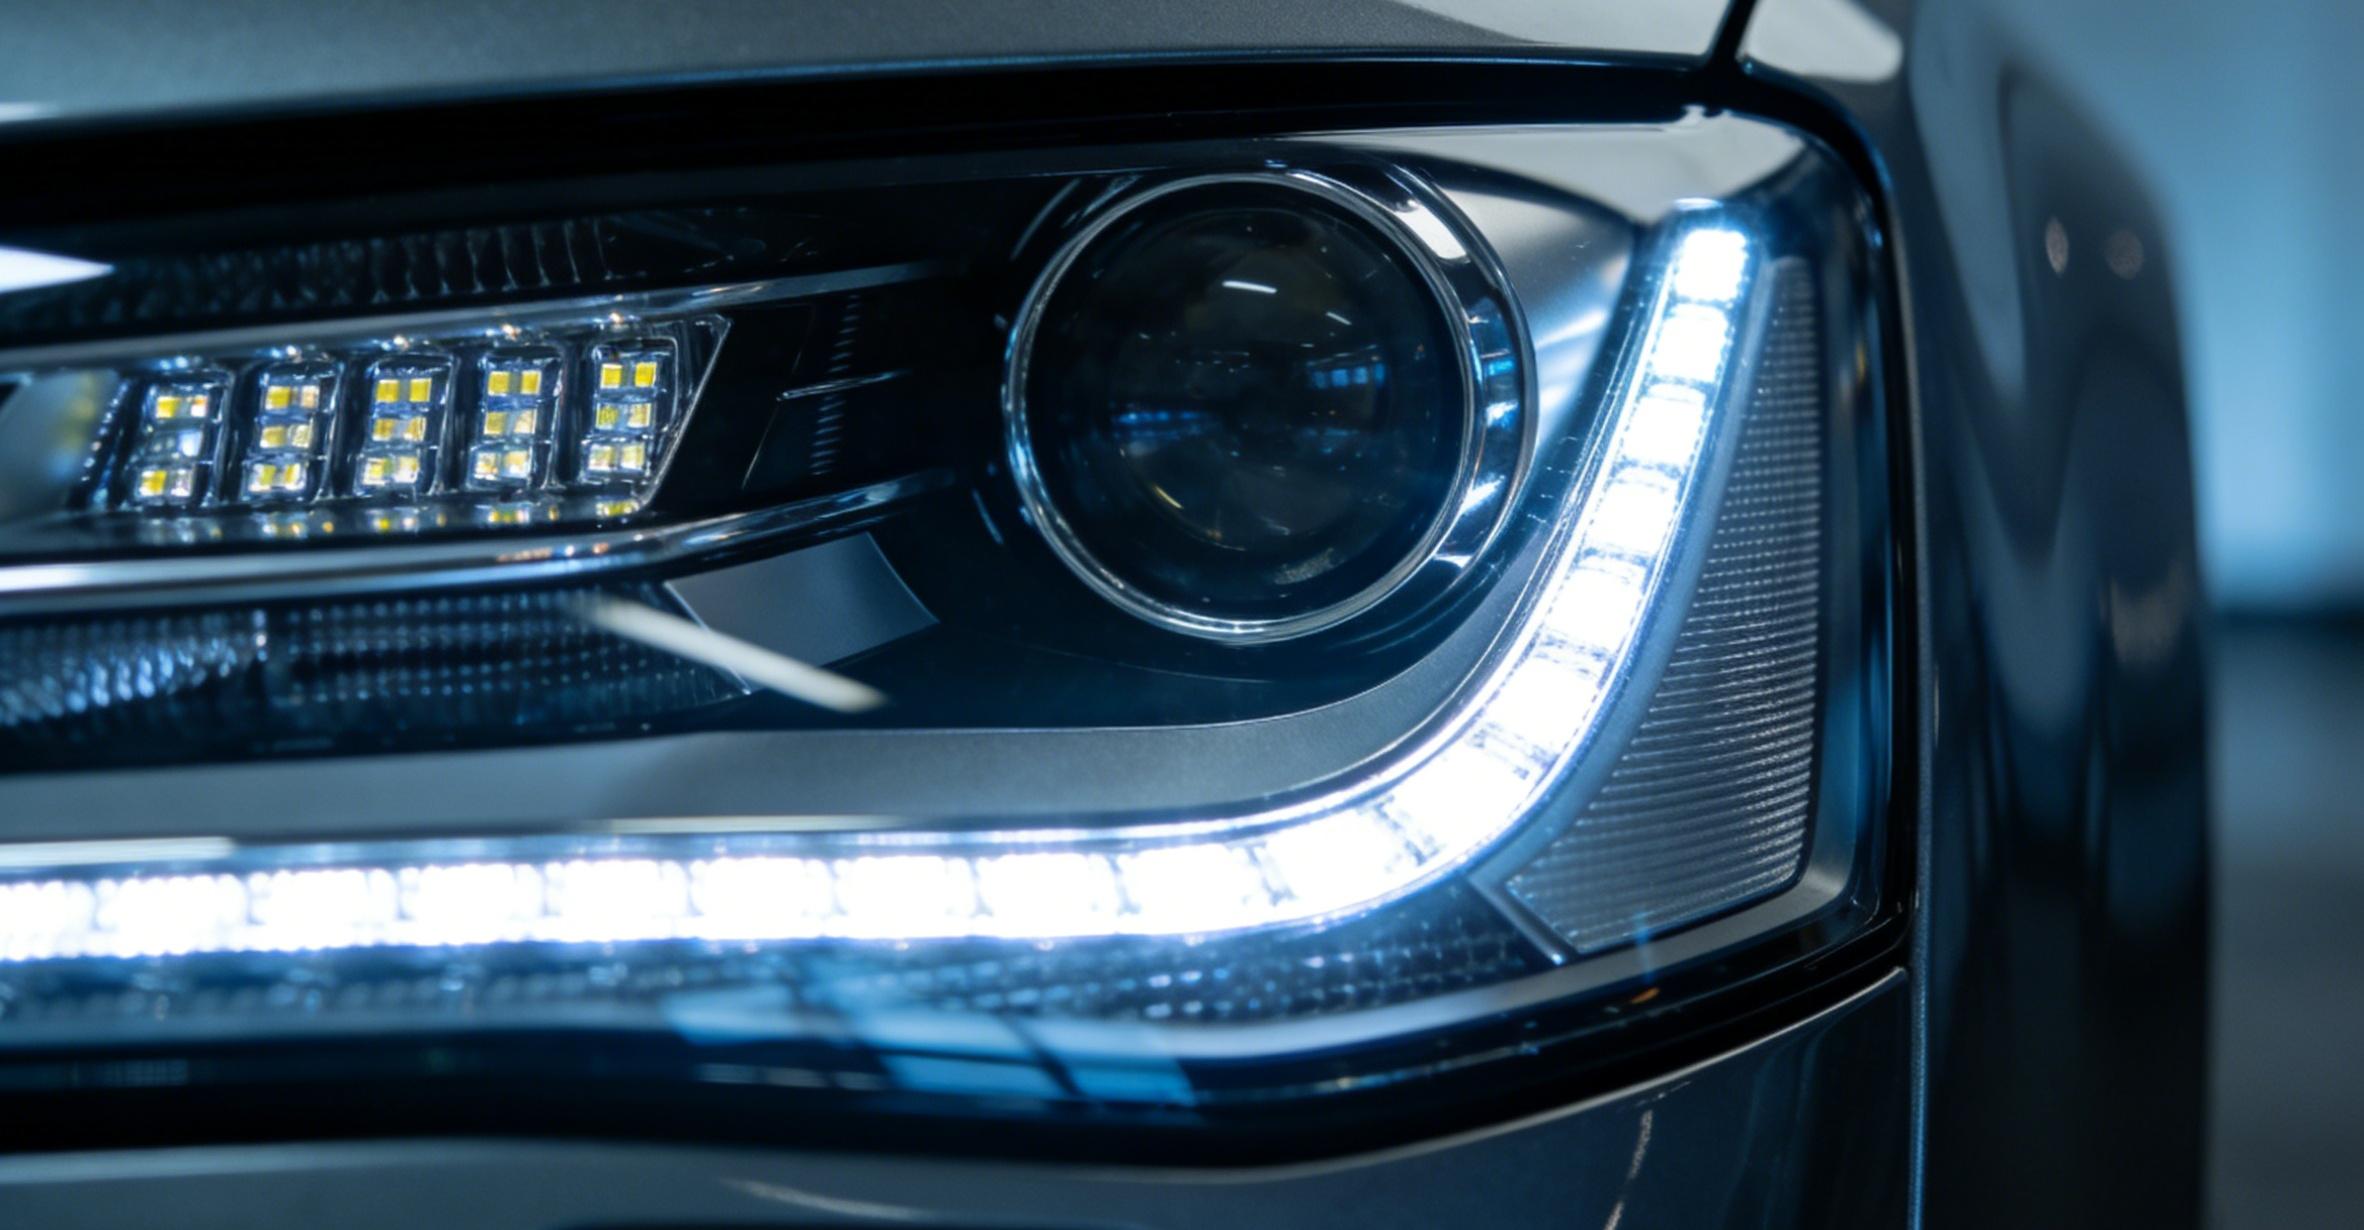
Adaptive and matrix LED assemblies
Adaptive and matrix LED systems represent a more advanced category of headlight assembly. These designs use multiple lighting segments, shutters, or actuators to shape the beam dynamically based on speed, steering input, or surrounding traffic conditions. They can improve night driving performance, but replacement and calibration are more complex and more expensive than conventional systems.
Remanufactured assemblies
Remanufactured headlight assemblies are rebuilt units that often include restored housings, new lenses, replacement brackets, or refinished external surfaces. In a good program, remanufactured assemblies can provide OE like fitment and appearance at a lower cost than a brand new OE unit.
Performing Security Verification During Parts Purchase
When ordering headlight parts online, performing security verification is a practical step that helps protect both the buyer and the purchase. In this context, security verification includes checking that the seller’s website uses HTTPS, confirming secure payment methods, and making sure the store provides valid business contact information.
A reputable security service on an e commerce website may also verify traffic before checkout in order to protect the site from fraud, fake activity, or automated abuse. If a verification successful message appears during checkout, it usually means the site has confirmed normal user access and allowed the customer to continue browsing.
Buyers should still review product details carefully, including OE numbers, VIN fitment, warranty coverage, and return instructions. The goal of security checks is not only to protect payment information, but also to reduce the risk of ordering the wrong headlight assembly from an unreliable source.
Some websites may display a verification screen while the buyer is waiting for checkout access. In some cases, a security page is displayed to verify that the visitor is a real user rather than a bot. That process helps the security service block suspicious traffic or malicious bots before they interfere with the site. Once the website verifies the session, normal browsing and checkout can continue.In some cases, the verification page may include a transaction or session reference. Buyers may notice technical details displayed on the page while the security service verifies the connection.
How to Install
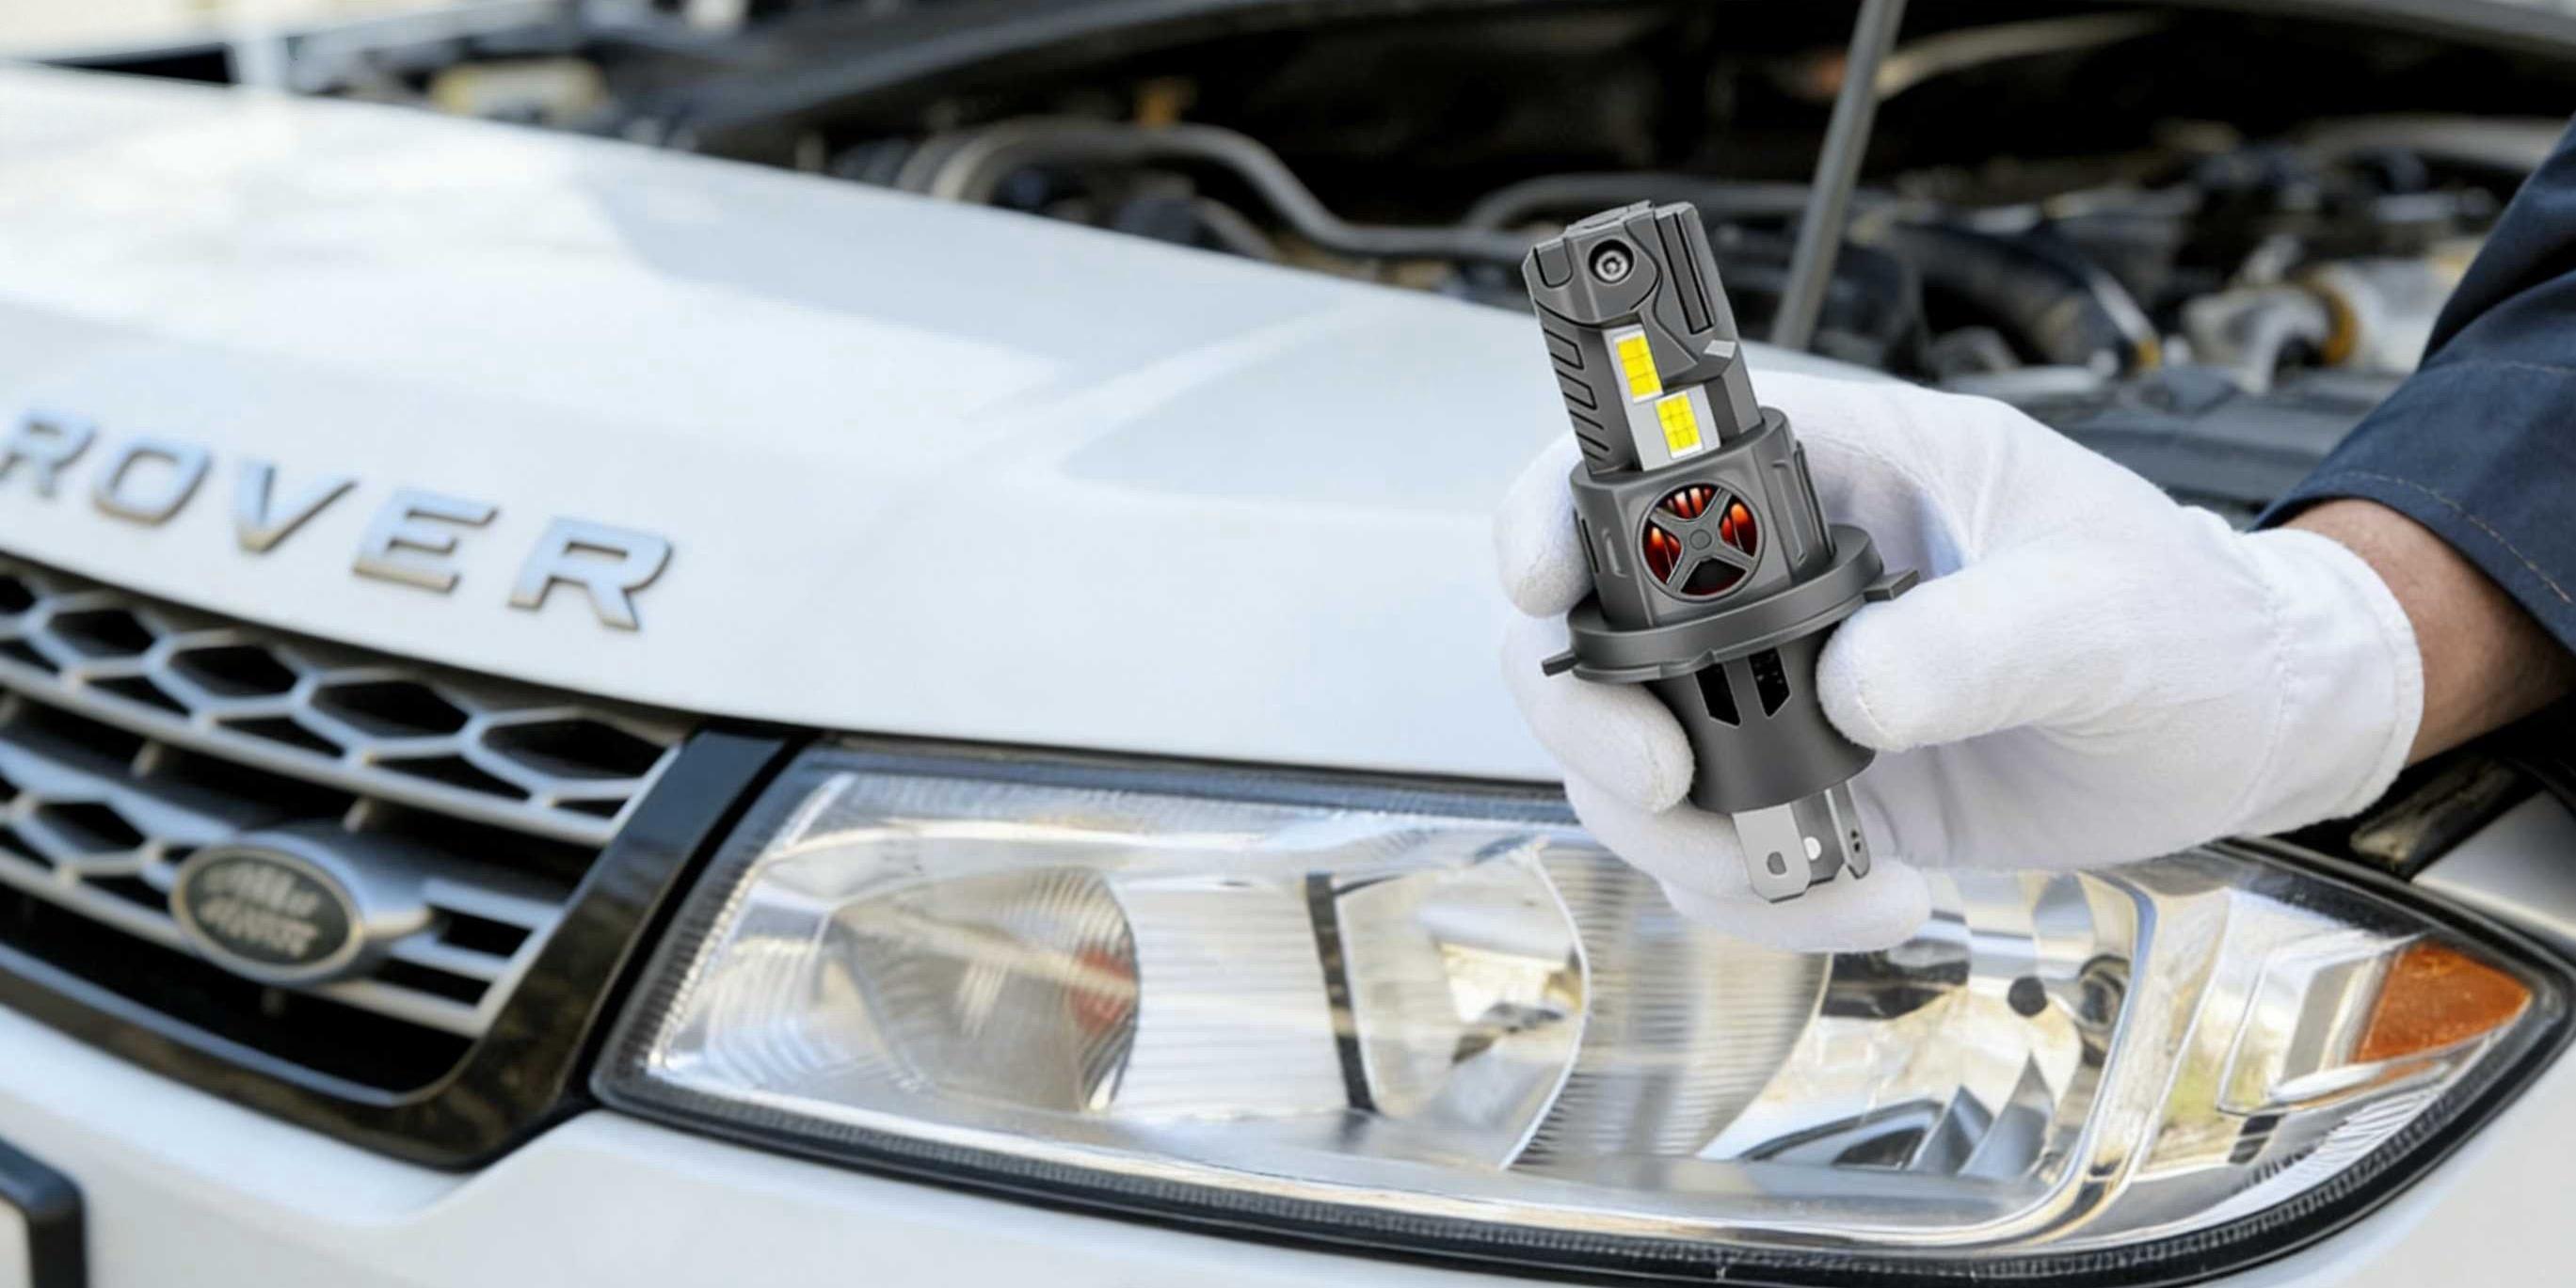
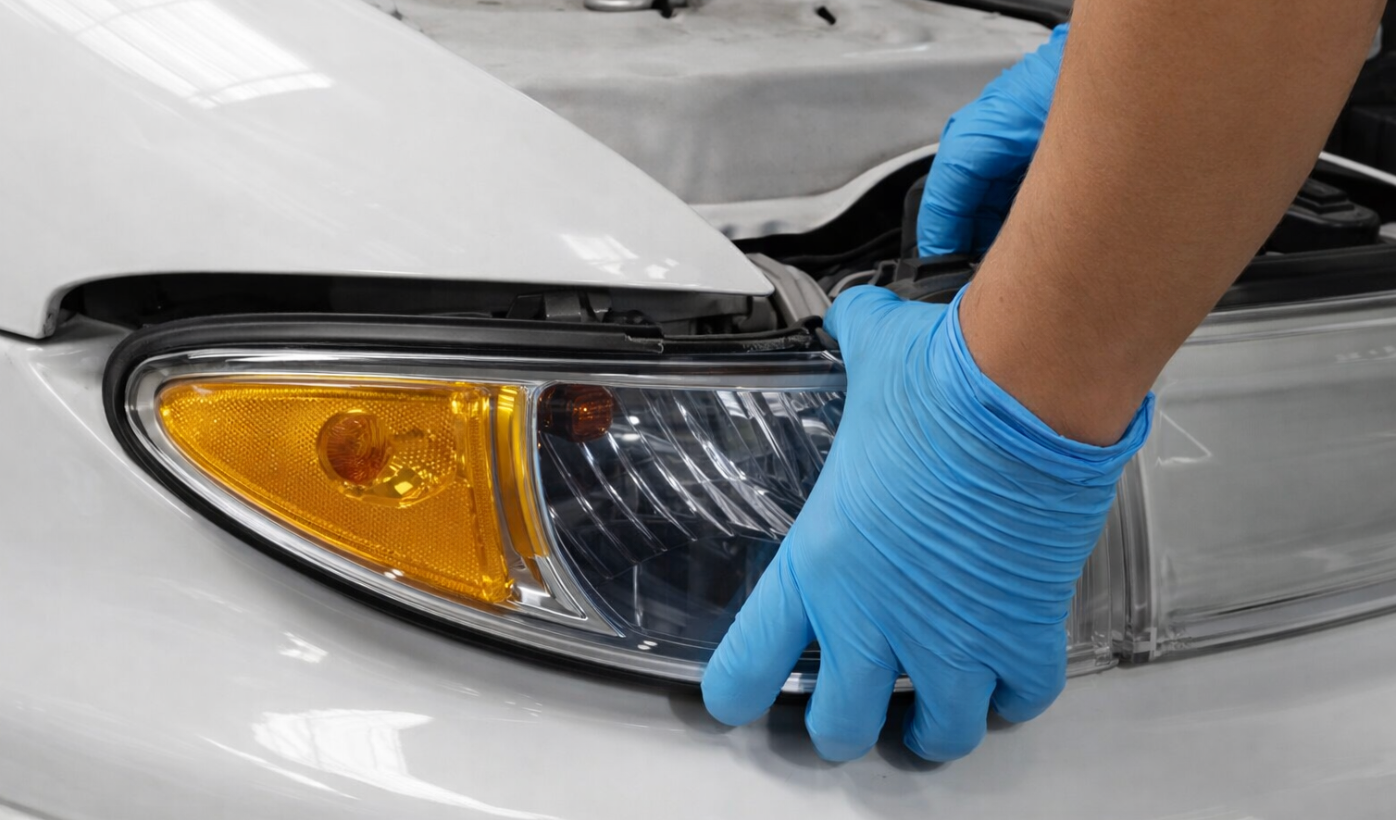
The exact removal process depends on the vehicle, but several best practices apply in most cases.
Turn off the vehicle and disconnect the battery to prevent electrical issues before starting the installation or removal process. It is important to locate the mounting screws, typically found around the perimeter of the headlight housing, and identify any clips, bolts, or fasteners that must be removed first.
To remove anassembly, you typically need to turn off the vehicle, disconnect the battery, locate the mounting screws, unscrew the mounts, unplug the wiring harness, and then remove the assembly. For most vehicles, it is a simple matter of removing the front grille, undoing a few screws, unplugging the wiring, and taking out the old assembly.w
During removal, unplug the wiring harness gently to disconnect the headlight plug wiring before removing the assembly. The wiring harness connects the bulbs to the vehicle’s electrical system, supplying power from the battery and preventing flickering or dead lights. The headlight plug wiring connects the bulb to the vehicle’s electrical system, so it should be handled carefully to avoid damage.
When installing a new headlight assembly, confirm that the housing, lens shape, connector layout, and mounting points match the original part exactly. Once you have the part, you usually just need to work backward to plug it in, bolt it into place, and reattach anything you took off. Installation is the reverse of removal, and it is important to reconnect the electrical components after installing the new assembly.
After installation, reconnect all wiring, tighten the screws properly, and test low beam, high beam, DRLs, turn signals, and any leveling or adaptive functions. A proper install should restore brightness, beam control, and road visibility without causing warning lights or fitment issues.
It is advisable to consult your vehicle’s service manual or watch a model specific disassembly video before starting the installation. Operating a vehicle with improperly aimed headlamps is illegal and dangerous, so consult a properly equipped repair shop if you are unsure.
Signs You Need a New Headlight Assembly

- Headlight assemblies are typically designed to be replaced as a unit every 5 to 10 years, or earlier if damaged. You know it is time to install a new headlight assembly when the headlight does not come on or has become cracked.
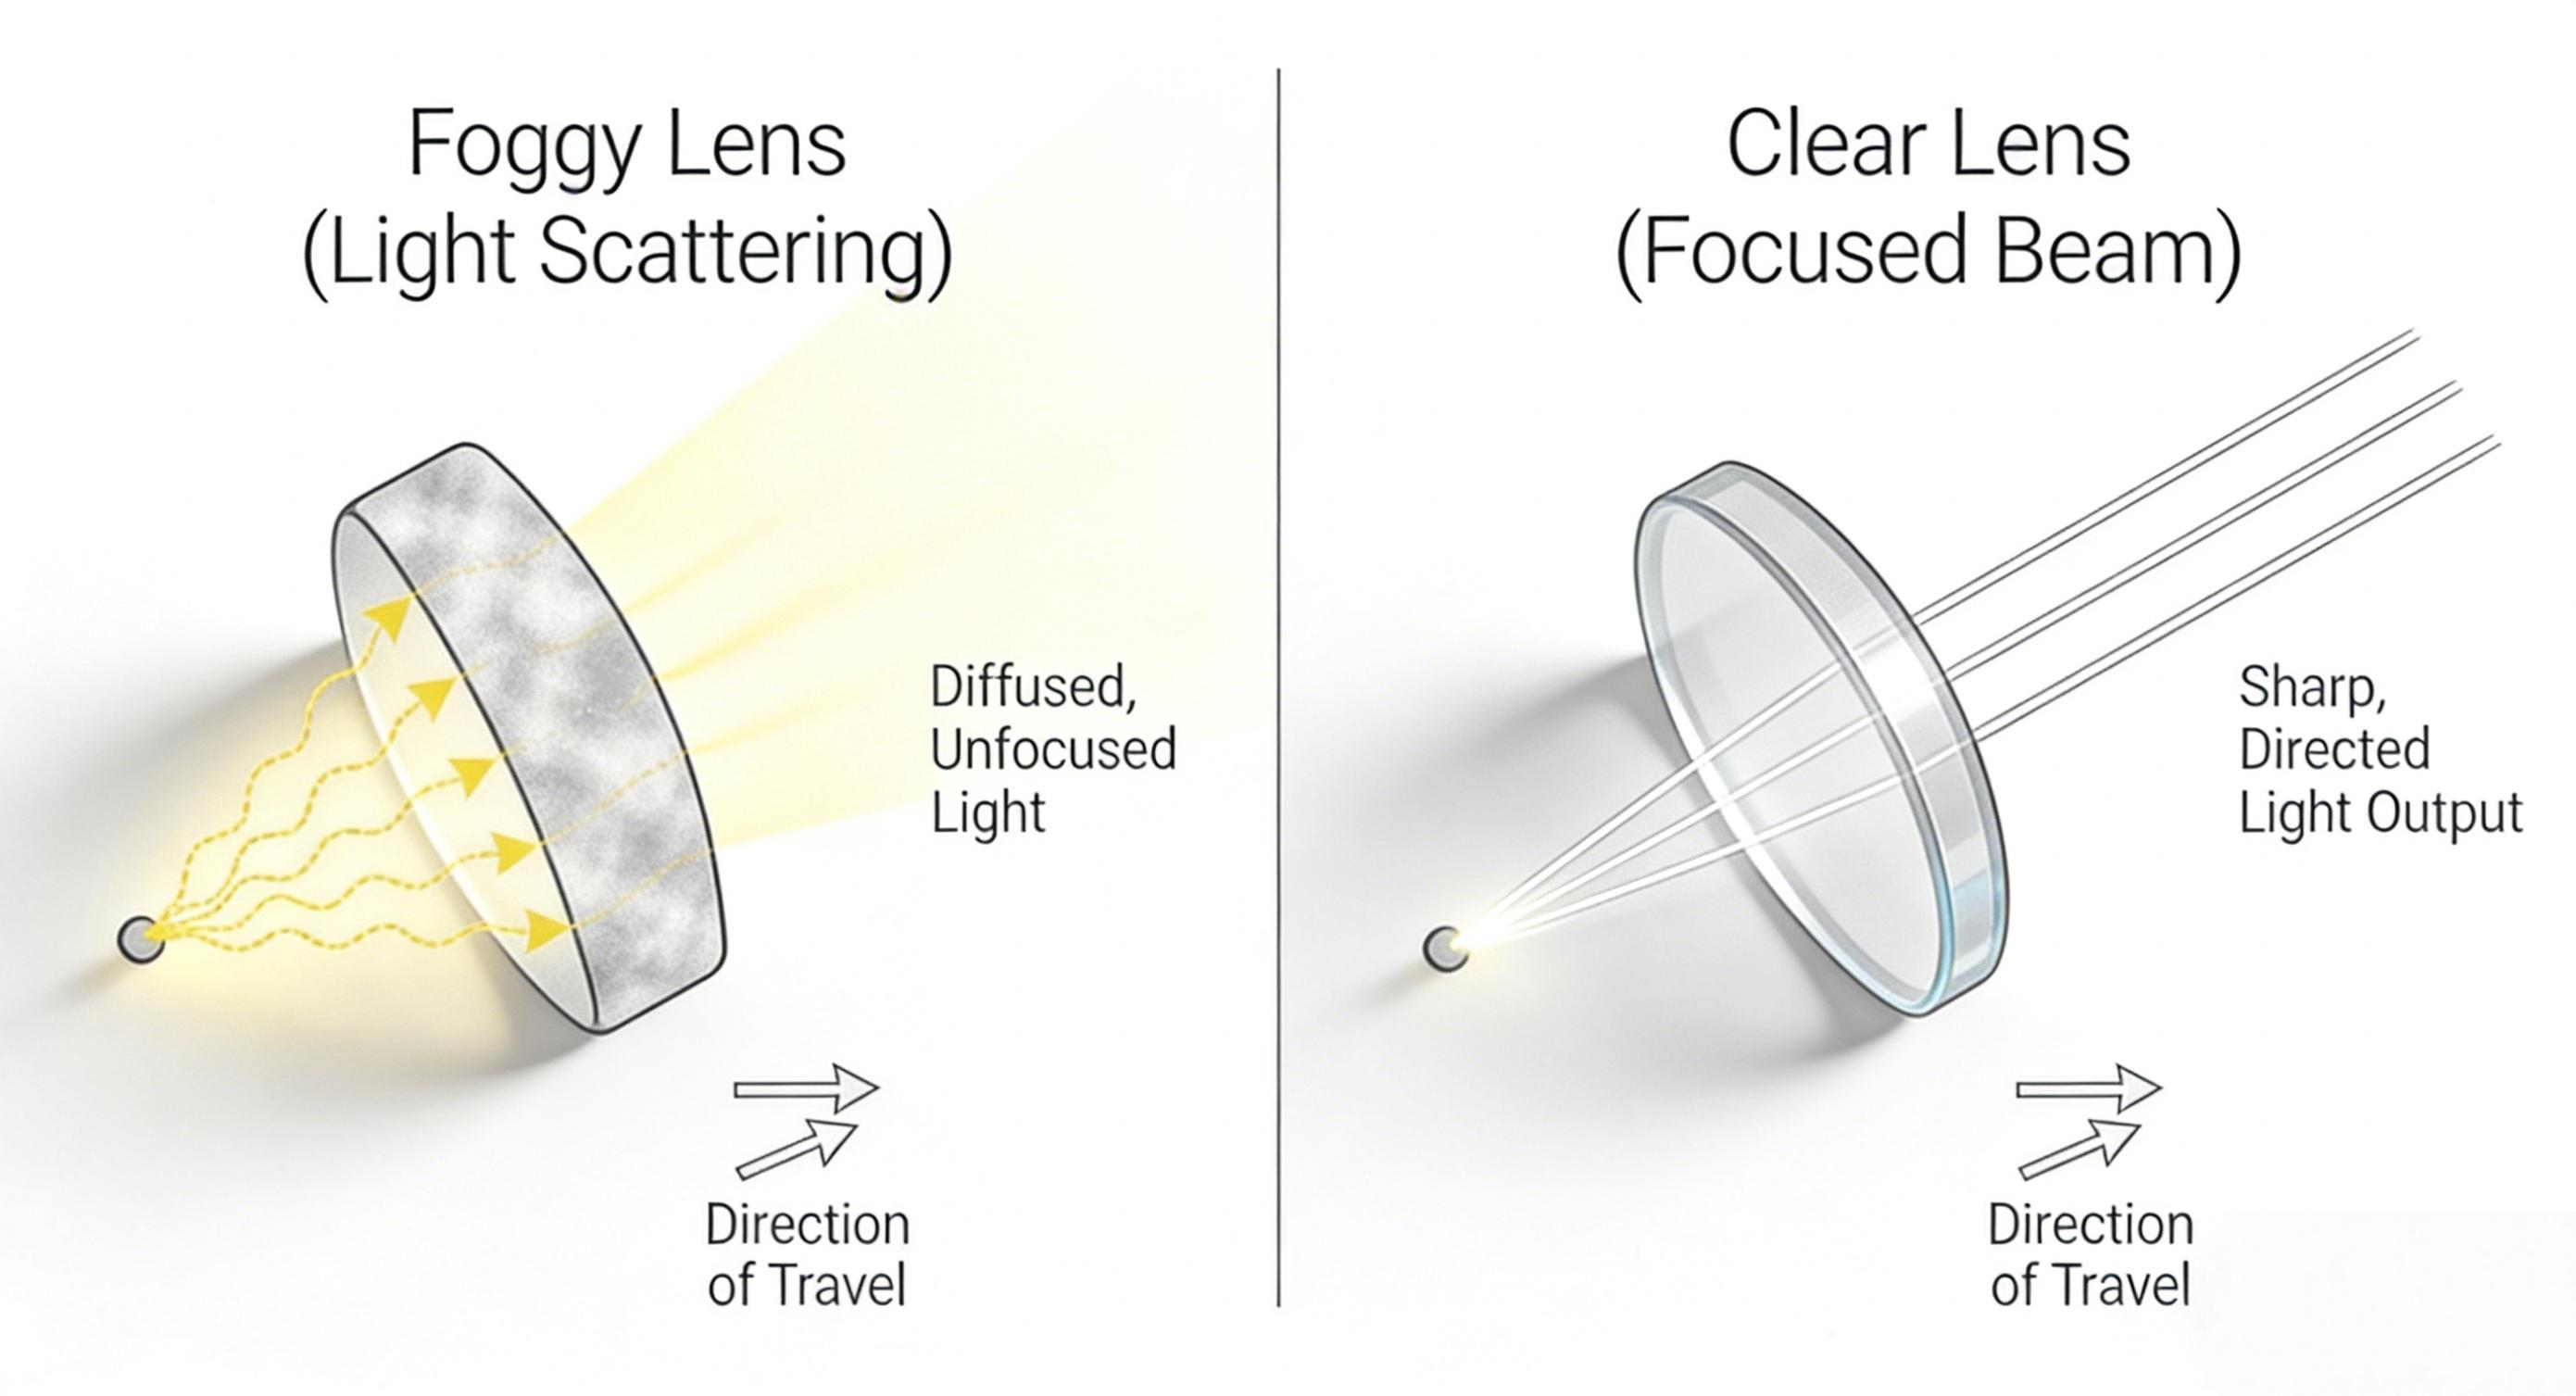
- A foggy or yellowed lens, cracks or other damage, water or condensation inside the assembly, flickering lights, dim lights, and poor beam control. Several common symptoms suggest that replacing the complete headlight assembly may be more appropriate than replacing a bulb alone.
- Persistent condensation or water inside the housing often indicates a failed seal, cracked housing, or venting issue. Even if the lamp still works, internal moisture can reduce output, damage electronics, and shorten service life.
- Cracked, hazed, or yellowed lenses are another common issue. Once the lens surface has degraded severely, light begins to scatter rather than project cleanly onto the road.
- Repeated bulb failures or flickering despite installing new bulbs may indicate deeper electrical or internal assembly problems. Causes can include heat damaged connectors, ballast issues, internal wiring faults, or unstable LED driver performance.
Cost Effective Options: Remanufactured and Aftermarket Headlight Parts

Remanufacturedheadlight assemblies can often cost 30 to 60 percent less than new OE units while restoring an OE like appearance and fit. This can make them a strong option when cosmetic quality and mounting accuracy matter, but budget is limited.
There are reliable suppliers in the market offering remanufactured headlight assemblies with strong fitment consistency and restored OE like appearance. If you are interested in this type of cost effective solution, feel free to discuss with us and compare available options carefully.
Warranty, Calibration, and Post Installation Checks
Warranty coverage is one of the most practical differences between product categories. Many OEM and remanufactured assemblies include limited warranties that begin at purchase or after registration. Buyers should confirm the terms in advance and keep all documentation.
Calibration is another critical issue on vehicles with more advanced lighting systems. If the headlight assembly is integrated with ADAS related functions, auto leveling, or adaptive beam control, professional scanning and calibration may be required after replacement. A physically installed assembly is not always electronically ready without this additional step.
Post installation testing should include more than simply turning the lights on. A complete check should verify beam pattern, height, automatic leveling operation where applicable, error codes, and stable function of all associated lighting features. On more advanced vehicles, an electrical fault scan may also be necessary to confirm that the new assembly is fully communicating with the vehicle.
Frequently Asked Facts About Headlight Parts
Replacing a full headlight assembly commonly costs between $150 and $1,200, depending on whether the replacement is OE, aftermarket, or remanufactured, and whether the vehicle uses halogen, HID, LED, or adaptive lighting technology. Labor, calibration, and module transfer can add to the final cost.
Upgrading to LED may improve energy efficiency, service life, and brightness, but legality and beam compatibility should always be checked first. A brighter light source is not automatically a better or compliant solution if the optical system is not designed for it.
Q&A:
Can I replace only the bulb instead of the full headlight assembly?
Sometimes yes. If the lens, housing, wiring, and internal parts are still in good condition, replacing the bulb may be enough. If the assembly is foggy, cracked, electrically unstable, or poorly aligned, replacing the full headlight assembly is often the better fix.
How do I find the right headlight assembly for my car?
The best way is to check the OE part number, use a VIN based fitment tool, and confirm the year, make, trim, and lighting configuration of the vehicle. This helps ensure a guaranteed fit or exact fit.
Is an aftermarket headlight assembly a cost effective option?
It can be. Many aftermarket headlight assemblies are more cost effective than OE parts and can help save money, especially on older vehicles. However, optical quality, fitment, and warranty support vary, so buyers should compare more than price alone.
Conclusion
Choosing the right replacement means looking at more than appearance or price. Fitment accuracy, beam quality, system compatibility, installation complexity, calibration requirements, and warranty support all matter. Whether the best option is OEM, aftermarket, or remanufactured, the goal should always be the same: safe performance, correct function, and a repair that lasts.
If you are evaluating replacement options and want a clearer view of fitment, beam performance, or product selection, feel free to contact us. We are happy to help you compare options and find a solution that fits your vehicle and application.

